Showing posts with label Curing meat. Show all posts

Friday, May 25, 2012

Home-cured Gravlax (Smoked Salmon) on a Toasted Baguette


Curing salmon at home is now a monthly affair for me - I just can't get enough of this wonderful creation called gravlax. Today, I cubed it and served on a toasted baguette with creamy scrambled eggs and sprinkled fresh chopped dill all over. Cubed ones seem to taste much better than the usual strips that twirl into a flower.

This was how I cured it at home with no special tools whatsoever. A reputed cookbook that I had read cautioned that smoking salmon should be left only to professional chefs. What the heaven. Tell me, how elitist can you get and still breathe.


Tuesday, April 17, 2012

Beef Carpaccio Vietnamese Style - A Stunning Starter


This is such a stunner to kick-off a meal in style - beef carpaccio. Read What is carpaccio and who is Carpaccio? Many people are put off by its rawness and the colour, so this is definitely not one for the faint-hearted. I would serve this only to myself and my hubster lest I be blamed for any weak guts! I've researched enough to give me the confidence that beef, at its freshest and bestest, can be eaten raw.

I stumbled upon this recipe from The Ravenous Couple, a second-generation immigrant Vietnamese-American family. Below is my recipe adapted from their site. But first, a word on lean protein.

Most beef we eat today, no thanks to commercialisation, are high in fat content. Based on my reading, it seems few cows today get to eat grass throughout their entire lives. What I thought was the norm has become the exception. I read about the benefits of grass-fed cows vs grain-fed and am convinced I need to go for the best, especially in carpaccio.

This beautiful piece of beef tenderloin (most suitable for carpaccio) is very smooth and clear, with little marbling because there is little fats in it.


Yes, somewhat pricey you may say at S$62.00 per kilogram but I would rather spend money on good food than on medical costs. Let food be your medicine.


Here's the recipe and method I used:

Ingredients
182g beef tenderloin (Use only premium meat. Buy from a reliable source and buy only on the day you serve the dish.)
Toasted peanuts, 2 handfuls
Fresh shallots, 5-6 small ones
Fried shallots, 2-3 Tbsp
A bunch of herbs (I used coriander and basil)
Juice from half a lemon
Juice from one lime (see how I cut my lime to get maximum juice)
Sugar, 1 Tbsp
Fish sauce, 1 Tbsp
Fresh chilli or chilli flakes, to taste

All my fresh ingredients - I like freshness to be the hallmark of my food.

Method
1. Did I say, Buy only premium beef tenderloin?
2. Freeze the beef for about half an hour so that it is easier to slice thinly, or get your butcher to do it for you.
3. Squeeze lemon and lime juice into sliced beef pieces. Add sugar and mix well. Cling-wrap and store in the fridge for 2-3 hours. The citrus juices will cure or cook the meat. Stir and mix again after an hour.
4. Toast peanuts in a dry hot pan. We call this dry fry.
5. Fry some shallots or get ready-made ones if you are feeling lazy.
6. After 2-3 hours, the meat turns a dull pink. Drain the meat and squeeze the liquids out.
7. Rinse bowl and return meat to bowl. Add fish sauce and mix well.
8. Prepare the rest of the garnishes. Slice fresh shallots, shred some herbs.
9. Lay the beef slices out in a single layer on a large plate and sprinkle garnishes all over. Add chilli flakes or fresh chilli for colour and kick.

How it looks before going into the chiller. (I chopped up the coriander stalks and threw them in as I found its garden-fresh smell irresistible.)
And three hours later. It looks more cooked than medium rare!

Isn't this absolutely gorgeous? You can adjust the taste to your liking, add more citric juice if you prefer it tangy or a few more sugar drops for a sweeter taste. I like to minimise anything if possible so I can taste the meat for what it is. I was mighty pleased to receive a positive review from my most honest critic, yes, hubster himself, and I would be delighted to get your comments on this post.


Thursday, March 15, 2012

Ignorance is bliss, truly


Just read in a cookbook - "To produce good quality cold-smoked fish requires a high degree of skill because it is difficult to get the flavour and texture just right."

Oops, sorry, too late! This extra virgin chef already did it many times. And my verdict in the first post on smoked salmon was: "Highly suitable for virgin chefs. No culinary skills needed." Wah ha ha!

Moral of the story? Don't allow the few elite in the world to SMOKE you and cloud your idea of what you can or can't do. Beware, the Ides of March.


Tuesday, January 17, 2012

Home-cured Pancetta - Part IV. Wait, there's a Part IV?


It's been more than 2 months since I started curing this piece of pork belly. I open it up to peep at this baby whenever my curiosity gets the better of me.

On 14 November, it looked like this at the start of this interesting culinary project that has captivated me since.


After 10 days


After about 25 days


Today, I opened it again after more than 60 days and find that I could possibly use it!

I cut some very small pieces remembering how salty and rubbery they tasted the last time I tried when it was not quite ready. Scattered them over my home-made pizza and the verdict?

Does my pizza look sexy or what. Thanks to my friend Grace for a very simple recipe. 

Extremely salty but no longer as rubbery. The longer time I give it to allow for the curing process, the better the texture but it also means deep salt penetration. If salt is the key ingredient to cure the meat so that I don't die from eating contaminated raw meat, then how does one reduce the saltiness in the taste? Hmm.. need to find someone who has done this.

I can continue to use the pancetta as an ingredient for pasta and pizzas as the Italians do on a daily basis but I will have to rinse off the crazy salty on the next use.


Here's a picture of the pancetta done by the professionals which I bought in a Tuscany morning market. Doesn't it look absolutely gorgeous? I have yet to try it but will do so very very soon and let you know how it tastes.

Beautiful piece of pancetta from Tuscany now sitting in my fridge
My pancetta butcher. We used an iphone app to ask him in Italian how much it costs. We were perfect in our articulation and then were completely stunned at his answer 'cos we couldn't catch a single word he said!

For those very interested and crazy enough to waste time doing this, please read the previous posts before you attempt. And remember to write to me about it!! Adios!

Home-cured Pancetta Part I
Home-cured Pancetta Part II
Home-cured Pancetta Part III
What on earth is a Pancetta??


Thursday, January 12, 2012

Italy - a working farm


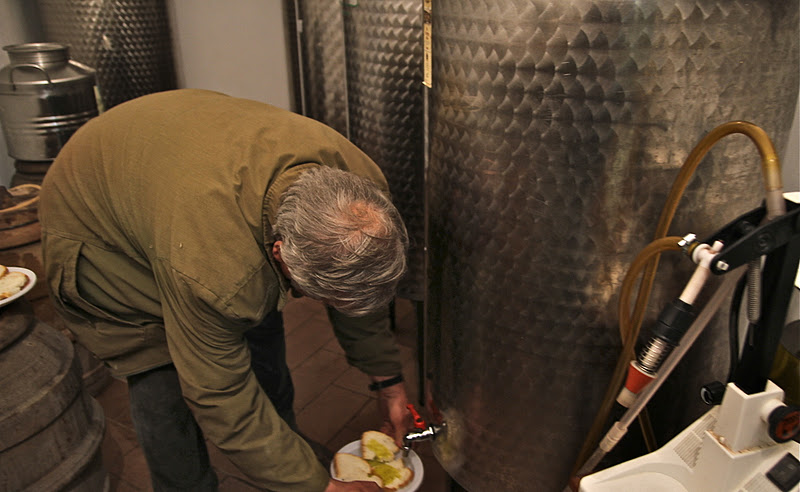
Today, we visited Luciano's working farm just 10 minutes drive from our farmhouse at Cretaiole. He had just slaughtered 2 pigs yesterday and today, he has invited us to come over at 4pm to see what he's doing with them. We walked into this what looks to me like a murder scene in a farm barge. Here, Luciano's men are stuffing pork sausages. On the left, you can see their home-bottled tomato paste.


Luciano cures his own meat - these above are more than a year old hanging next to his wine barrels.

He lifts up this netted crate to show us his cured cheese as well.


 Luciano slices off his pancetta for us to taste.


We also tasted his extra virgin olive oil fresh from the infusion and before bottling. 


It was a totally enjoyable visit and I wish I could be a farmer's wife ... maybe just for a little while!


Monday, December 5, 2011

Home-cured Pancetta - Part III


Click here for - Home-cured Pancetta Part I (This took about 10 days)
Click here for - Home-cured Pancetta Part II (This is supposed to take 30 days but I can't wait!)
Click here to find out what a pancetta is - Word of the Week: Pancetta

OK, it hasn't been a month yet since Part II but I am giving in to my impatience and utmost curiosity on how this is going to turn out. Besides thinking about duck fat, my mind also keeps wandering to this thing that has been sitting in my fridge for the past 2 weeks. To be quite honest, my expectations range from "I could get botulism from this" to "At worst, just junk the whole thing."

So, this is how it looks right now. Completely dry by now. The bottom part has darkened considerably.


I slice them open to find this. OK, looks kinda promising but I am still totally wary. It smells good in a herby way.


Not sure of what to do next, I cut them into a typical pancetta look. It looks like lard with layers of fat interspersed with meat of different shades. I decide to take the risk and pop one in my mouth. It tastes salty and rubbery and I spit it out!! Oopsy. What am I going to do with this thing? I need some advice here. Hello, anybody there? Houston, we have a problem.


OK, think!

OK. I cling-wrap them back and I'm going to use it as if it already works as a pancetta. I'll add them to my pizza or pasta tomorrow. Or I could pan-fry them to see what happens.

Anyone has any better ideas?

Now, while I have little to boast of this culinary experiment, I can't help but notice how interesting this shot looks. Does it look like something out of a magazine? I can't take my eyes off it!


Wednesday, November 23, 2011

Word of the Week: Curing

My home-cured salmon with dill
I didn't forget it's Wednesday today. Word of the Week for today is "Curing".

Curing is a form of preserving or flavoring food especially of meat or fish, and dates back to ancient times. The process involves adding mainly salt, sugar and herbs. In very simple terms, the idea behind curing is that adding salt to raw meat removes water and moisture thereby eliminating an environment where bacteria can grow and multiply. Salt also slows down oxidation, preventing the meat from turning rancid. 

There is a lot to read and learn about curing and smoking on the internet. Just based on some simple research, I managed to do some home-curing and have lived to blog about them. Check out how I cured salmon - click here. Also, I am in the process of curing a pork belly to make pancetta - click here for more. Or go to the "Curing Meat" label/section on this blog.

If you have any questions on Curing, let me know and I'll be happy to do more research on your behalf as I am also interested to learn more in this area. Just spare me the lame (caught the pun?) healing and disease-curing jokes that my friends are texting me on!

My chef said I can tag onto his order for salmon for the restaurant so I'm going to be getting some good deals! That can only mean more curing projects - and more posts - from me!


Word of the Week features a culinary term each week, usually on a Wednesday. I picked up this practice from the culinary school and have continued with this learning journey after I graduated. See previous Word of the Week:


Mirepoix
Chiffonade
Confit


Monday, November 21, 2011

Home-cured pancetta - Part II


For those who missed my first post on this topic, here's the link - Home-cured pancetta Part I.

For those who are still wondering what the heaven a pancetta is, click here - Word of the Week: Pancetta.

And for the faithful followers who have written to say you want to know the progress and outcome of this culinary experiment, here's an update. In the last post, I showed you a picture of how the cured pork belly looked after Day 4 - that was where we left off.

And now, Day 10 or 11, frankly, I lost count and didn't date it because it doesn't really matter.

Day 10 in the fridge, or was it 11.
After ten days of curing this in the fridge, I remove and rinse thoroughly under running water, then pat dry with kitchen towels.
The underside has also turned dark.
Now, technically speaking, I have a pancetta in my hands. But all that is only Part I.

Having rinsed it off the curing mixture, I now proceed to Part II where I rub a spice mixture and leave it in the fridge for a month or so. Yes, a month. Troublesome but also kinda fun to keep this in suspense. 

Some people have a curing chamber where they can control the temperature and humidity. For enthusiastic amateurs and virgin chefs like me, I will make do with leaving it in the fridge. I've researched many sites and found this to be acceptable too. 

So I prepare my spice rub here.
My spice rub consists of Oregano, thyme, tarragon, chilli flakes, paprika, chilli powder, black pepper -
my own concoction of whatever I have in the cupboard that I want to get rid of, no quantity, just an estimate of what is enough to cover the pork belly fully.
I keep staring rudely at the different herbs and spices and they don't mind, something I couldn't do to my colleagues in the corporate world.
I spread the spice rub on a flat porcelain casserole and rub them all over porky.
I also stuff them into the scores I cut.
Tried to cover them as fully as possible but they keep dropping off.

So this is how it looks just before I cover them and pop them back into the fridge for a whole month. I'll give you a sneak preview around mid-December before I take off on a tour in Tuscany, Italy where I get to see first-hand how the experts there cure their meat. I'll be posting actively then, so do look out for it! (Readers in Europe, write to me!)

Cheers for now, and thanks for the likes and follows!

Friday, November 18, 2011

A chef's comments on my blog

I had the privilege of having a chef sit beside me this afternoon giving his professional comments as he scrolled through some of my blog posts. He scrutinised my pictures in my roast chicken post and told me where I could improve, e.g., trussing the chicken better for a more even roast, and gave me many tips on enhancing the flavour. He directed me to Thomas Keller, a world renowned chef and one of his specialties is in making a perfect roast chicken.

He also looked at my cured salmon and cured pancetta and asked his head chef to consider letting me cure some meat in future in his walk-in chiller. Now, how cool is that for an extra virgin chef!

My curing experiment attracted a chef's attention today.  Kewl!

Monday, November 14, 2011

Home-cured pancetta - Part I


The pork belly I left out to dry for a couple of hours

Ingredients I used to cure the meat (from top left): Brown sugar, black pepper, sea salt flakes, ground nutmeg, dried thyme, pink coarse sea salt, crushed bay leaves, minced garlic
I scored the meat and pushed the curing marinade in. Then I cling-wrapped and kept in the fridge.
It will stay there for 10 days. 

OK, here's how my pancetta looks after 3 days. I drain the excess water every 24 hours.

Meat has turned darker which is expected. Curing meat with salt is about extracting the moisture from the meat so bacteria cannot grow and multiply. 


This is what I need to see - water extraction from meat.
Cling-wrap and back to the chiller
 After 4 days...


Will keep it in there for another week or so. Meanwhile, look out for what exactly is pancetta in this week's Word of the Week.

Click here to follow the progress in Home-cured Pancetta Part II.